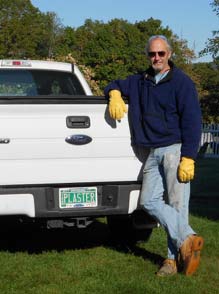
Many people believe that “plaster wall repair“ is an oxymoron. They feel that plaster walls cannot be repaired.
It’s true that some plaster walls can be difficult to repair, especially if they appear too far gone. That being said I’ve never met old plaster that couldn’t be fixed. But, like rust on a car, you need to start at the first sign of problems. It’s much easier and cost effective to preserve what is there and fix it, than tear it out.
The moment you start tearing out chunks of plaster, it’s a never-ending story of more mess and more money. One chunk leads to another, and before you know it, your backyard is full of plaster and you’re shopping for drywall!
 Oh, by the way – you cannot replace original plaster with anything as good, but that’s for a future blog.
There is so much information available online that for many it’s hard to know what makes sense and what doesn’t. Since all I’ve done for the past thirty years is fix plaster, which incidentally has given me the opportunity to learn about methods and materials that do not work as well as those that do work, I can honestly say there is only one way to repair plaster for the long haul.
Being from old Yankee stock, I am most interested in spending the least amount of time and money in the pursuit of my goals. Thrifty does not begin to describe my condition. I will spend good money on quality materials that last a long time. The thrill of “cheap” soon fades in the face of poor materials and short-lived repairs.
When it comes to repairing plaster, I want to fix it so it lasts. It’s not only about what is least expensive now, it’s also about the money I do spend; I want the results to last as long as the life of what I’m fixing. For plaster, it’s a multigenerational material.
That being said, when I search “plaster repair” online, I get numerous articles that start out with some variation of “take a sharp tool and dig out the cracks, maybe insert screws and washers to crush the plaster to the lath, put drywall tape over the dug-out cracks, and spackle over the tape and/or screws until you get a hump on top of your plaster where the crack used to be.”
Well, the Old Yankee raised his head again and said the emperor has no clothes, well not really, but it seems to be an awful lot of work for a surface that now has a big hump on it; and it took lots of effort and a dusty mess to get there, oh yeah, and lots of clean up as well (my favorite thing to do!).
Did you know tape and compound only hide the crack without fixing it? I never did believe – if it couldn’t be seen it wasn’t there. And putting compound on top of the painted surface – I hope you have faith in that paint bond! If it starts coming off so does your repair.
That’s why when using the Plaster Magic® plaster repair system nothing is left on the surface.
There was nothing on the market that satisfied the specifications I needed for a plaster repair product, everything was half-baked, adapted from other uses, or borrowed from the drywall trade (up to and including….sssshhhh….removing the plaster and filling in with pieces of drywall). Given that there are at least 20 million houses with plaster and lath in this country it seemed a shame that this need wasn’t being addressed by any manufacturer.
So, I said to myself, Self, there has got to be a better way. And as it turns out there was, and the better way to repair plaster appealed to that Old Yankee that lives in my skin. The better way turned out to be a unique patented adhesive formula. But as you can read in the first step on every tube of construction adhesive (except Plaster Magic®), some variation of: “surfaces must be clean and free of debris, oil and dirt.”
While an adhesive seemed to be the way to go, there were a number of obstacles that needed to be overcome in order for an adhesive system to work in that very difficult location (debris trapped inside a wall being the hardest one to beat).
Tune in again soon for another ramble in the Plaster Magic® story.
