Adhesive Reattachment
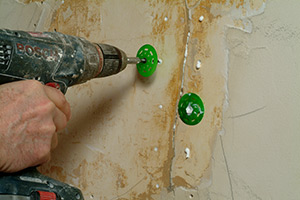
 Drill it.
- Drill holes with a 3/16” masonry bit about 1” to 2” from the crack. When you hit the lath, stop and drill another hole about 3” away (drill to every other lath). Continue along both sides of the crack.
- For loose or bulging plaster, space the holes evenly across the area, 3” to 4” apart.
- Vacuum plaster dust from holes.
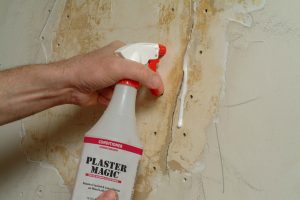 Spray it.
- Adjust the sprayer nozzle tip to the stream setting. Apply three to five pumps of conditioner into each hole.
- Wipe the excess with a wet sponge and wait 10 minutes for the conditioner to soak in.
- Included is an oral syringe for more directional application of conditioner
- Clean sprayer nozzle after use to prevent clogging: Remove sprayer nozzle from bottle, flush with clean water. Replace top on bottle.
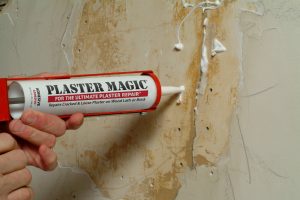 Glue it.
- Trim the tip of the adhesive tube close to the end so it fits securely in the drilled holes.
- Apply one squeeze per hole (or less, as needed) by gently pulling the trigger of the adhesive gun until a little comes back out. No need to glue any hole that missed a lath.
- Wipe away the excess with a wet sponge.
 Clamp it.
- Screw the plaster clamps into some of the existing holes on each side of the crack, every 8” to 12”. Screwing in the clamps will draw the plaster and lath into “soft” contact with the adhesive.
- Wipe away excess adhesive on the surface with a wet sponge.
- Allow to dry 24 to 48 hours.
- Unscrew the clamps and remove them with a putty knife.
All there is left to do…
Apply, all-purpose ready-mix joint compound to all the cracks and holes. Prime and paint, or finish as desired. You’ve restored your plaster permanently, in half the time and with less effort and mess than other methods.
Simple tools required:
- Drill, Phillips Screwdriver & 3/16” Masonry Drill Bit
- Caulking Gun
- Sponge & Bucket of Water
- Putty Knives
- Safety Glasses
- Ready-Mix Joint Compound