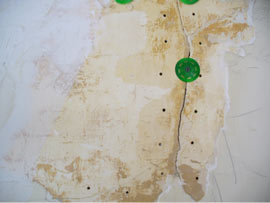
 We call this inferior method of plaster repair the “Scrape and Tape.” It is commonly deployed on a crack in a plaster wall or ceiling. The repairman uses a metal scraping tool, such as a paint scraper, to gouge a groove directly over the crack. He will then typically use drywall screws to secure the plaster around the crack to the lath. He then uses joint compound to fill in the groove, either with or without drywall tape or mesh, just as he would treat a seam on installed drywall.
“That sounds reasonable. Why is the ‘Scrape and Tape’ method wrong?”
Well, think about it. That crack didn’t choose a random spot on your wall or ceiling to attack. That crack appeared because of instability in the structure. If you don’t stabilize the plaster, the same problem crack will reappear — it’s just a matter of when.
Please don’t believe a handful of drywall screws and some “cover up” tape and joint compound is the solution to the problem. It’s like using a blue tarp to fix a leak in your roof.
That’s why it’s crucially important to “properly” and securely reattach the plaster to the lath, as shown in this image.
Luckily, there’s a way to stabilize the plaster and permanently repair cracked plaster walls or ceilings. Injecting an adhesive like Plaster Magic® behind the plaster and using a special screw/washer combination to securely attach it to the lath will fix the problem once and for all. Watch the video below to see this plaster repair in process.
